This blogpost is the beginning of a three-part tutorial in order for us to demonstrate the power of AWS Security Groups (SG). In this blogpost, we would create an AWS instance using the default SG (that disallows all inbound traffic) for us to appreciate the use of studying security groups and then we would create a security group.
In the next blogpost, we would place rules into the SG and demonstrate how we can connect our local machine to the EC2 instance that is associated with the EC2.
In the final blogpost, we would take this a step further and connect two EC2 instances within the same SG using SSH.
Now, let us get started on the tutorial by creating a AWS Instance.
Creating an AWS Instance with a default SG
Since the scope of this blog post is to demo how security group works, I will pass very quickly over how I launched the EC2 instance.
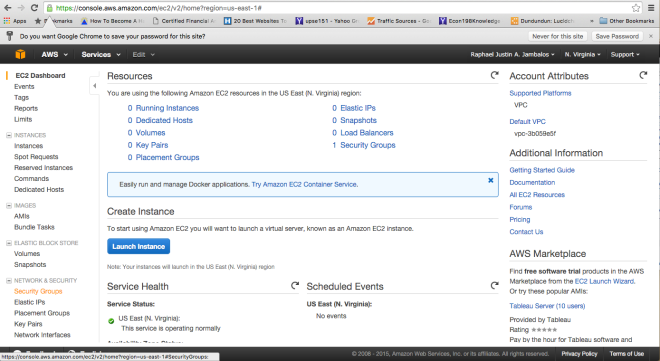
Using the IAM user I created from here, I go to my EC2 dashboard. I choose an Ubuntu 14.04 Amazon Image so that my EC2 would come preinstalled with Ubuntu 14.04. I then chose an t2.micro instance to minimise costs. And I associated the AWS instance with the default security group.
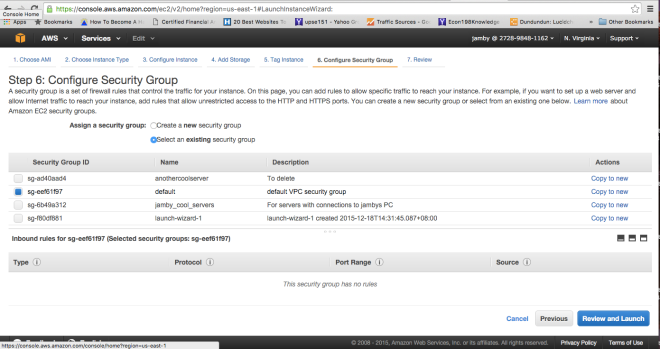
For our purposes, I intentionally set the default SG to have no inbound traffic rules so that we can demonstrate the server I just created is useless and inaccessible. AWS is even smart enough to detect the lack of SSH access thru port 22 and would warn you thru a popup.

Rule of Thumb: There usually is one default security group in Amazon. And the default SG if unchanged, does not allow inbound traffic but allows all forms of outbound traffic. Also, if you do not put any customized security group in the EC2 instance you are creating, you will be forced to take the Default Security Group.
Accessing your AWS Instance
To be able to access AWS instances you need a key-pair file and would need to refer to that file every time you do an SSH to your server.
ssh -i <keypairfile> <username>@<public_dns_name>
Username is ubuntu for Ubuntu servers, ec2-user for Amazon Linux, Fedora (or fedora) and RHEL5 & SUSE Linux (or root).
Hence, when I tried to access my server using my keypair file, it resulted in a connection time-out.

This is where the importance of a security group comes in. It is actually like a firewall that allows you to define which kinds of traffic can enter, from where and thru what ports. Pretty much like a higher-level iptables.
So now that we have an appreciation of the importance of security groups (henceforth referred interchangeably with the acronym SG), let us know create an SG.
Creating a Security Group
Go to the Ec2 console page of AWS and under the Network and Security Panel at the left side of the screen, choose ‘Security Groups’.
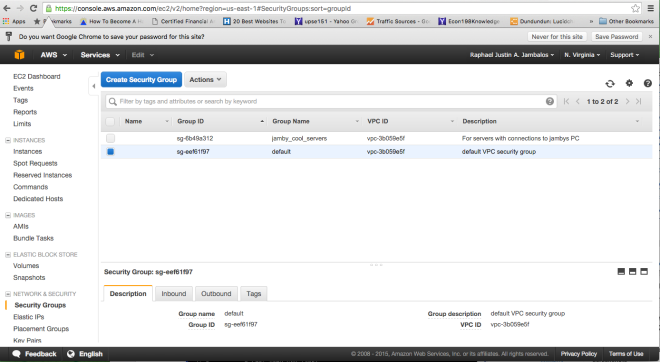
Once clicked, you will be redirected to a table that contains the Security Groups that you already have. If you are just getting started in AWS, you will see that you already have one SG in place. This is the default SG and when creating an EC2 instance without specifying an SG. To continue creating an SG, click ‘Create Security Group’.

You will then be directed to the screen below and will be asked to place the name of the SG, its description, the VPC it is associated with and finally, the inbound and outbound traffic. So fill up the Security Group Name. For the purposes of this tutorial, we would name our SG “jamby_cool_servers”
Best Practice Tip: When creating an SG, make sure that you make it as concise as possible, as AWS resolves conflicts between rules by allowing the most permissive rule possible. Meaning when you create a rule that allows SSH access thru port 22 and another rule that allows access thru all ports, the latter (which is more permissive) will be chosen and implemented.
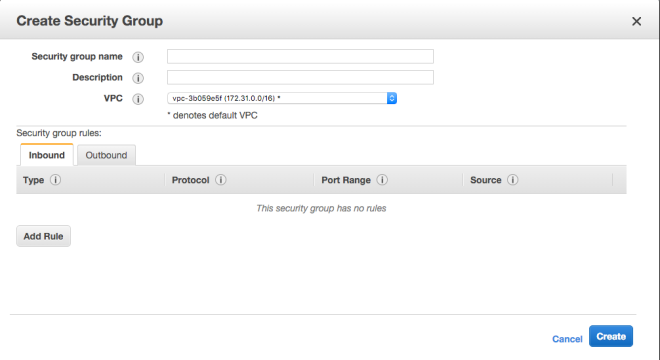
As you can see, by default the SG has no rules for inbound traffic (meaning it denies all inbound traffic). Outbound traffic however, is allowed across all ports and all protocols.

From this panel, we can already add/delete rules easily. But for this demo, we will not create rules from here, but would instead create it in the next section.
Now, we press create and watch AWS create our Security group.
To continue on with creating rules for the tutorial, go here

[…] AWS Security Groups: Setup […]
LikeLike